Set up cloud9 development environment
Keywords: AWS, Cloud9 Cloud 9, Collaborative Dev Development Environment
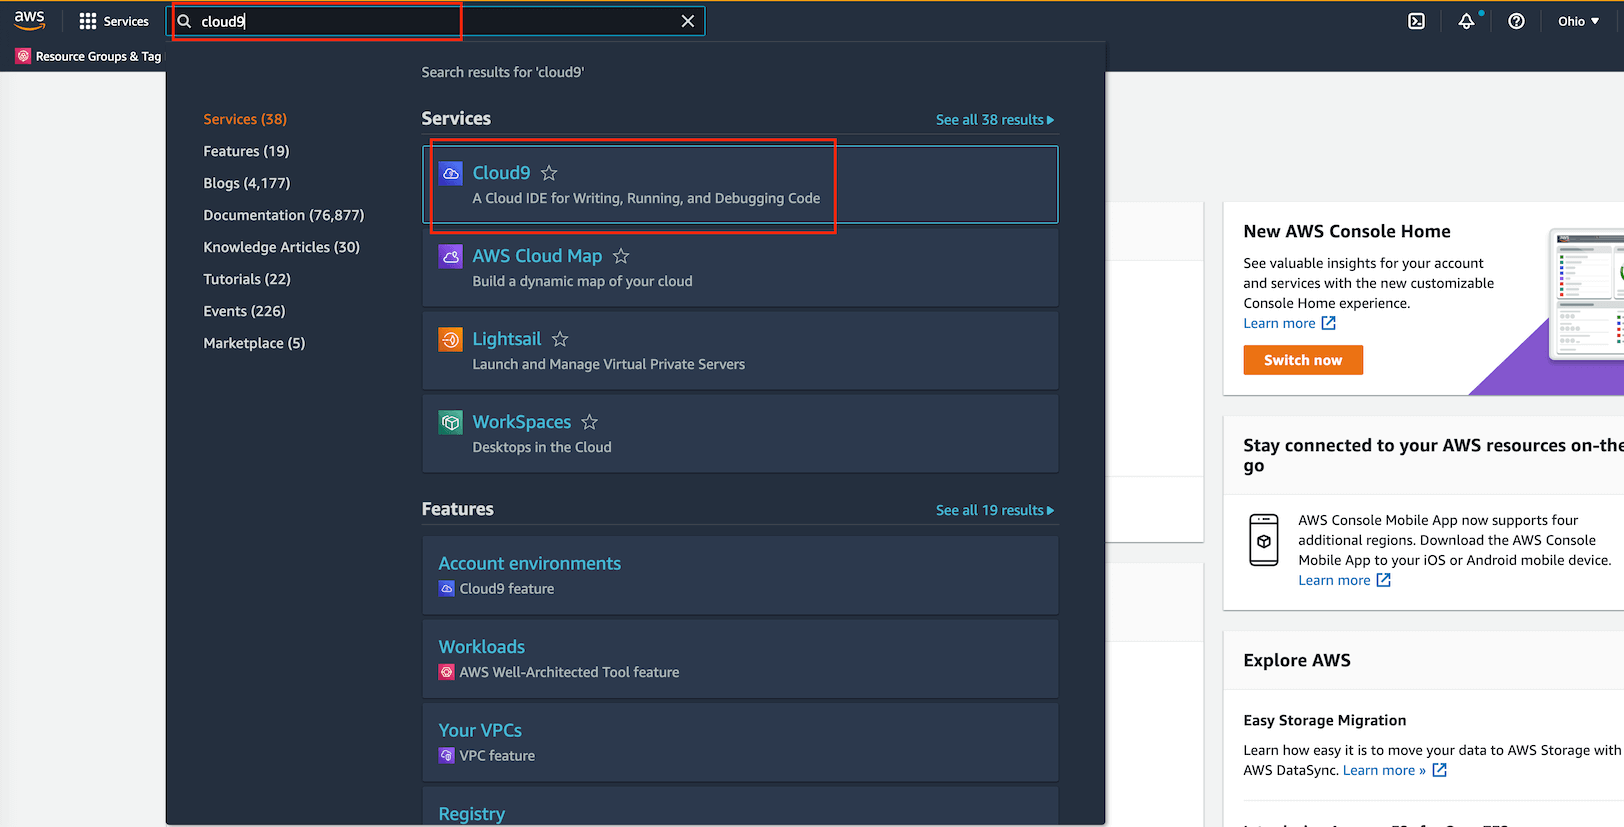
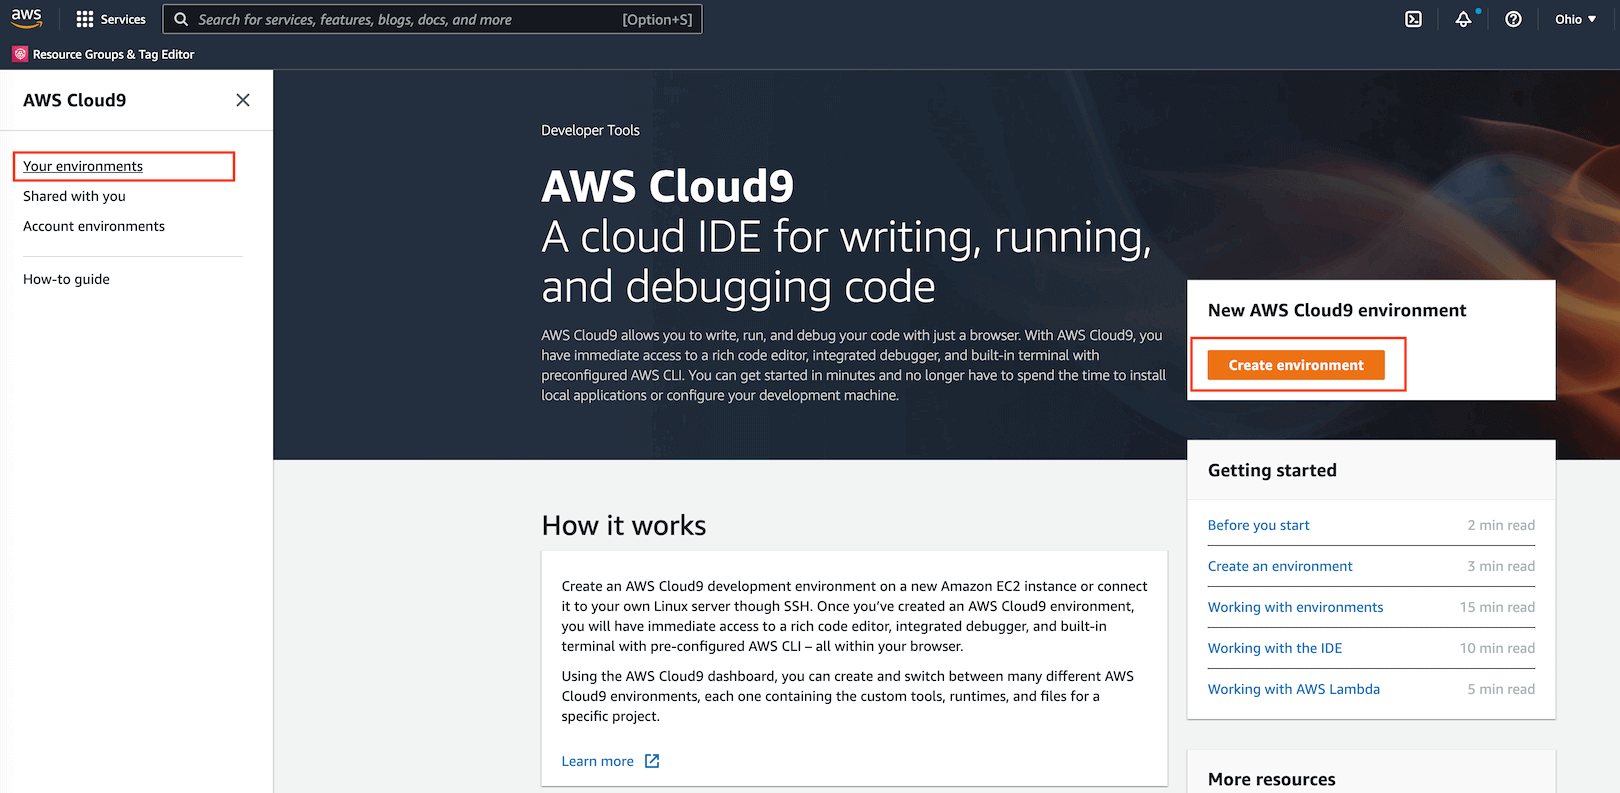
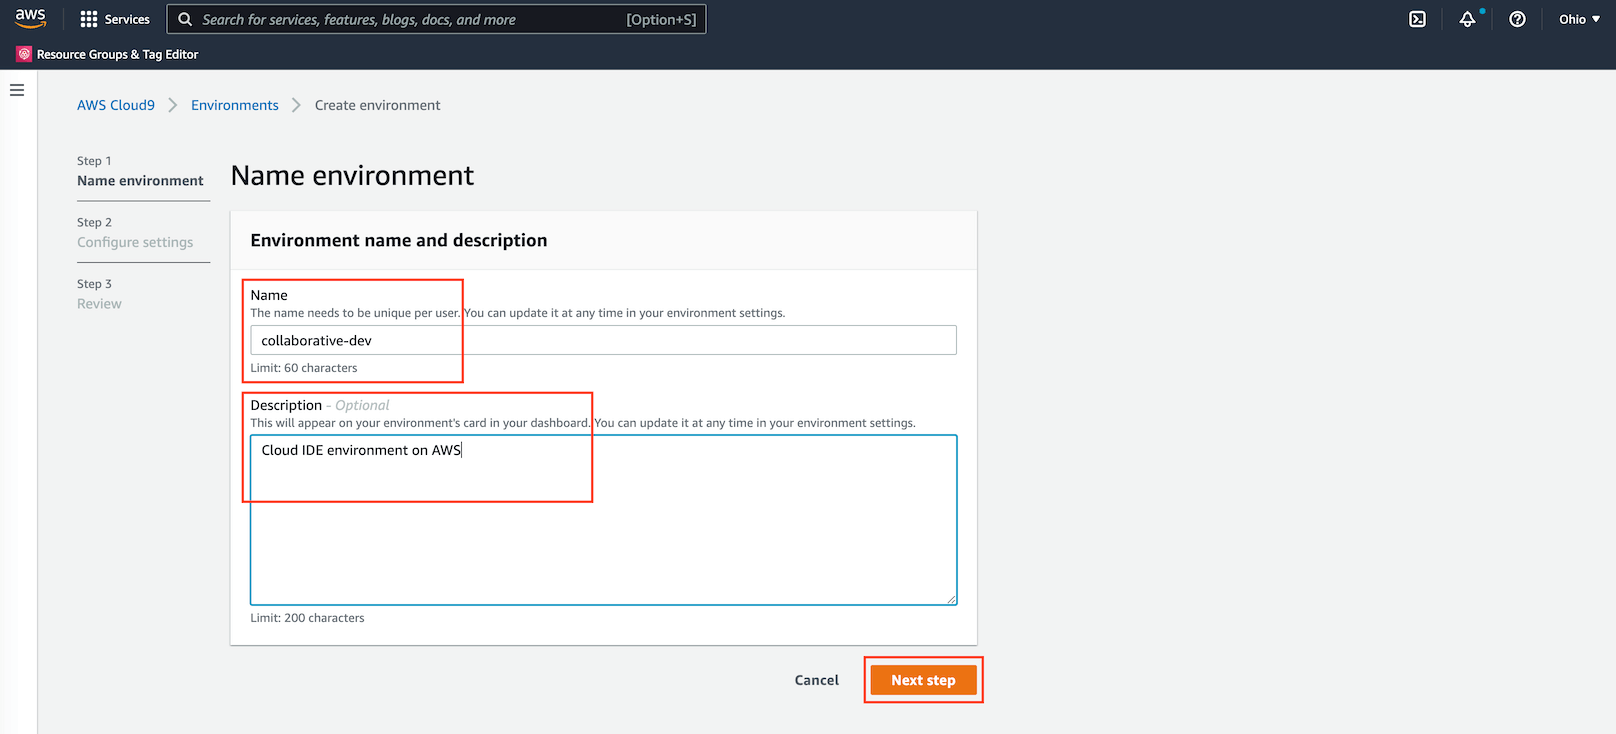
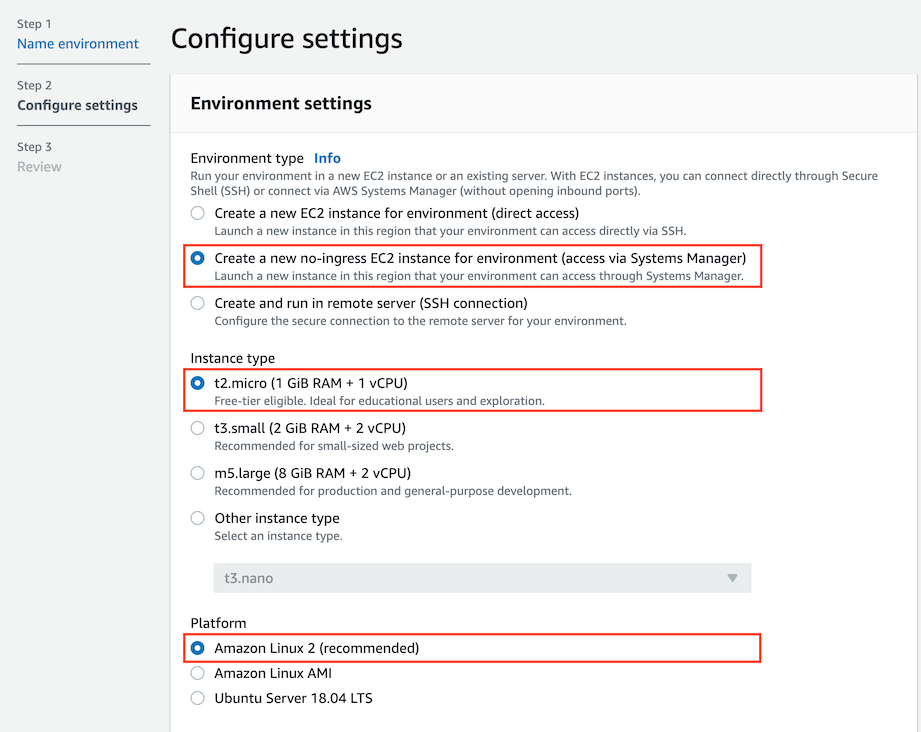
1. Create Cloud 9 Environment
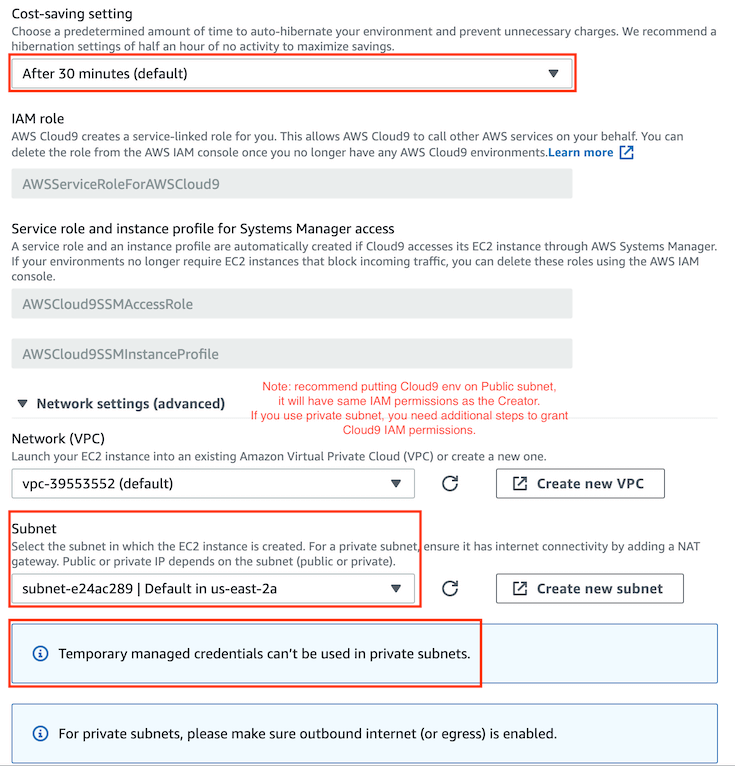
The native of Cloud 9 environment is just a EC2 virtual machine in your AWS environment on VPC. Follow this document to create your environment.
Creating an EC2 Environment: https://docs.aws.amazon.com/cloud9/latest/user-guide/create-environment-main.html
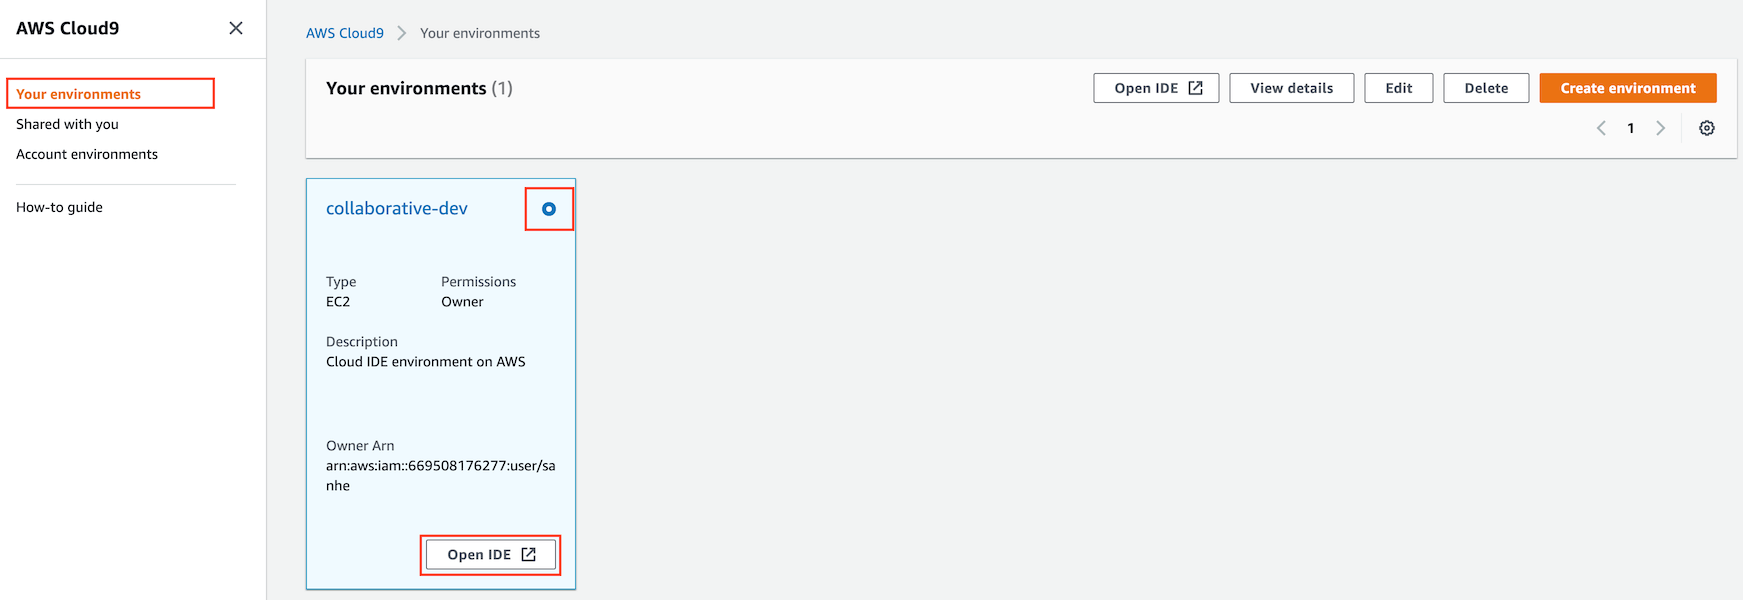
2. Use Cloud 9 IDE
Things to know:
Top main menu: classic IDE liked menu.
Left side tool menu: search anything, file explorer, SVC tool, AWS explorer.
File explorer: create / edit / rename / move / delete file and folder, show hidden files.
Code Editor: hot key for save / comment / close tab / etc …
Terminal: a local terminal with bash shell, you can use other shells too.
AWS Credential Management: manage the AWS access for your Cloud 9 VM.
Use EC2 instance Profile when using Cloud 9 in Private subnet: the AWS Managed credential won’t work when Cloud 9 is on Private subnet. You should consider using EC2 instance profile.

Reference:
Working with IDE: https://docs.aws.amazon.com/cloud9/latest/user-guide/ide.html
3. Use AWS Cloud 9 with Github
This tutorial shows how to securely pull and push a Private Github Repository on AWS Cloud 9.
Generate a GitHub personal access token (GitHub recommended way) for Authentication:
Go to GitHub -> Settings -> Developer Settings -> Personal access token -> Create one token -> grant the token Repo Read / Write access -> Store it securely.
Clone the Repo:
# Store token in a variable, so you don't need to copy and paste it insecurely
GH_TOKEN="abcd1234...."

# Clone the Repo with the Token
git clone https://${GH_TOKEN}@github.com/your-github-account-name/your-repo-name.git
Pull latest Code (Skip this if you prefer git cmd):
There’s a Git VCS ICON on your left top tool bar. You can see the cloned repo there.
There’s a Git Sync ICON on your left bottom tool bar. You can click to sync (Push and Pull) the code to / with remote.
Make change and Commit (Skip this if you prefer git cmd):
Go to Git VCS menu, click on the
+near theChangemenu to add changes to git. It isgit addequivalent.Enter commit message in the message box, click on the icon near your repo name, choose commit. Or you can just go to terminal and do
git commit -m "your commit message"Push to Remote:
Just click the Git Sync ICON, or
git pushManage branch:
There’s a Git Branch Icon on your left bottom tool bar. You can create / delete / switch branch in the branch menu.
4. Use AWS Cloud 9 with AWS Code Commit
5. Setup Python Development Environment in Cloud 9
You can do the develop from your local MAC laptop. For windows computer, some linux command may not work properly.
Another easy way is to create a AWS Cloud 9 dev environment, it is a cloud IDE environment on a EC2 virtual machine. It only takes a few clicks and a few minutes to create one, so you can start development from any computer. You can find a simple AWS Cloud 9 tutorial here
Check your current system Python and virtualenv CLI
# show full path of python interpreter
which python

# show python version
python --version

# show full path of virtualenv cli
which virtualenv
Clone this repo and CD into it
# clone the repo
git clone https://github.com/MacHu-GWU/aws_dla_opensearch_examples.git

# cd into the repository root directory
cd ./aws_dla_opensearch_examples
Create virtualenv:
# create virtualenv
virtualenv venv

# activate the virtualenv, you should see (venv) at begin
source ./venv/bin/activate

# pip install learn_opensearch package on your local
# you can make your code importable from virtual env
pip install -e .
Configure Runner to use virtualenv python.
Cloud 9 top menu -> Run -> Run With -> New Runner
// Create a custom Cloud9 runner - similar to the Sublime build system
// For more information see http://docs.aws.amazon.com/console/cloud9/create-run-config
{
    "cmd" : ["/home/ec2-user/environment/aws_dla_opensearch_examples/venv/bin/python", "$file", "$args"],
    "info" : "Started $project_path$file_name",
    "env" : {},
    "selector" : "source.ext"
}